An entry pass maker helps you design and generate passes for events, schools, offices, and private gatherings.
You can create free printable entry passes for small events using simple templates.
For paid events or large crowds, a digital entry pass maker with QR validation reduces fraud and speeds up check-in.
Secure entry passes can include QR codes, barcodes, unique IDs, and automated email delivery.
If you need bulk generation, scanning, and real-time tracking, platforms like
Ticket Generator
automate the entire workflow.
Events are getting bigger. Check-ins are getting faster. And entry mistakes are getting expensive.
The global event industry is expected to reach $2.5 trillion by 2035, according to Allied Market Research. More events mean more attendees. And more attendees mean that you need a reliable way to manage entry.
That’s where an entry pass maker comes in. Let's say you are looking forward to organizing a party or an event. It could be formal or informal in nature. For example:
A corporate seminar
A charity event
A concert
An Annual corporate meeting
A college graduation ceremony, a prom party or any other school event
Fun-filled Halloween event
Grand Christmas celebration
New year event
Informal events such as birthday parties and anniversary celebrations
Entry passes help you control access, reduce fraud, and keep lines moving. You can create simple printable passes. Or you can generate secure digital passes with QR validation.
Both work. But they serve different needs. While there are many tools that can help you create passes, there are some that let you go a step ahead. That means besides creating passes, you can also do the following:
Make sure that you grant entry to only authorized guests
Use passes to add to your branding effort
In this guide, I'll teach you:
How to create entry passes for free
When DIY printable passes make sense
When to switch to digital QR-based entry
How to avoid fake or duplicate passes
If you want full control over your event entry, from creation to scanning, tools like Ticket Generator help automate the entire process. But first, let’s break down the
A. Entry Pass vs Event Ticket: What’s the difference?
Many people use the terms entry pass and event ticket interchangeably. But they are not always the same.
An entry pass is usually used for controlled access. Think of school events, corporate meetings, private parties, exhibitions, or VIP areas. The goal is simple, allow entry to approved guests.
An event ticket is often linked to paid entry. It may include pricing tiers, seat numbers, discount codes, or resale protection.
Here’s how to look at it:
Entry pass → Access control
Event ticket → Access + payment + tracking
If you're hosting a free community event, a basic printable entry pass maker may be enough. If you're selling tickets or expecting a large crowd, you’ll need more, like QR validation, automated delivery, and fraud protection.
That’s where a digital entry pass maker becomes powerful.
For example:
QR codes prevent duplicate use
Unique IDs stop fake copies
Scan tracking helps you monitor check-ins
Automated emails save manual work
If your event involves payments, tiered pricing, or seat allocation, you may want to explore a full event ticketing system instead. In short, choose your tool based on your event size, security needs, and crowd flow.
B. When is a free entry pass maker enough? (and when it’s not)
From my experience, a free entry pass maker works fine for small events. If you’re hosting:
A classroom event
A small workshop
A family function
A free community meetup
You can design a simple printable pass in Word or Canva. Add the event name. Add the date. Maybe a basic serial number. Print and go.
You can also use Ticket Generator’s free entry pass templates if you want something more polished without designing from scratch.
That’s enough when:
You don’t expect a crowd
You don’t need scan validation
You’re not worried about duplicate copies
But things change fast when the event grows.
If you’re:
Selling tickets
Managing 100+ guests
Controlling VIP access
Trying to avoid fake entries
Manual passes start to fail.
This is when I switch to a digital entry pass maker with QR Codes. Scanning takes seconds. Each pass is unique. No confusion at the gate.
DIY works for small events. For real crowd control, automation wins.
C. Why use an online entry pass maker?
I'll be using Ticket Generator, show you how to you create entry passes. But before that, let's see what all can it offer you:
With Ticket Generation, you get this feature by default. You can create a landing page for your event by adding all the details you need. In addition, you can also specify the form fields to be filled out by the attendees.
Once you do it, the registration page will be created. You can then share it with your audience. The best thing is that you can choose if the registrations should be approved manually or automatically.
And once a registration is approved, the guests would receive their entry passes digitally. No need to send them manually. That means a single tool will help you both get registration and create passes against them.
2. Make passes that are resistant to forgery
Unwanted guests are not really quite pleasant to have at an event. And that's the whole point of creating passes. With them, you'd want to grant entry to only the people who are really invited.
But the problem is most passes do not really ensure that. For that, you can create QR Code-based passes that will solve this issue in no time.
Pro Tip: You can use
Ticket Generator
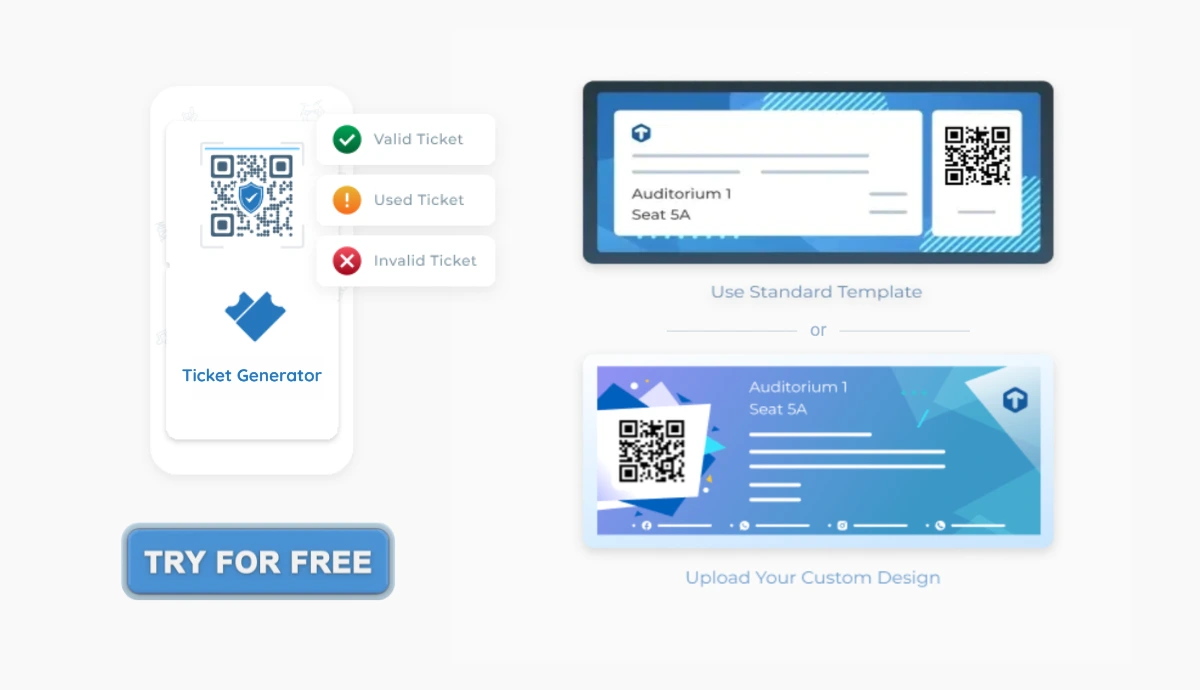
to create secure entry passes. Each pass includes a QR Code with a unique ID. When coordinators scan it, they can instantly see whether the entry is valid, invalid, or duplicate—leaving no scope for trespassing at your event.
3. Easy to generate and distribute passes
As the famous saying goes, if a tool is not saving you time or money, you shouldn't be using it.
Many generic tools out there help you design passes one by one. That means even if you have a design template, you'd still have to individually add the name and details of each guest. Now that is pretty much of a hassle.
But with Ticket Generator, you can create passes in bulk and yet add individual details to them. No need to worry about adding guest details individually.
In addition, you do not even need to print the passes unless you really want to. It allows you to send them straight to the guests? inboxes via email, phone, or both.
4. Branded passes with design customization
No event is complete without at least a little branding. As an organizer, you'd definitely want people to know about your or your client's business.
And event passes help a great deal with it. You can add the brand's colors and logo to the passes. Or you can use your own ready-made design and add pass details (guest name, date, description, QR Code, etc.) on it.
5. Analytics on the event performance
Once the event ends, any serious marketer and event organizer would like to see the analytics. It would not only tell you how did the event go but also what improvements to make in the future.
With tools such as Ticket Generator, you can easily get data on event performance. For example:
How many tickets were validated
How many tickets did each coordinator validate
What was the peak time
What was the count of tickets that were valid, invalid, and duplicate
With such insights, you will be in a better position to optimize your events in the future.
Set Up Event Ticketing and Distribution in Minutes!
First 10 tickets free | Free account | No credit card required
Option 2: Digital entry pass with QR Code (recommended for events)
This is what I use when things get serious. I'll be using Ticket Generator for this demo, read the steps below on how you can proceed:
Step 1: Sign up on an entry pass maker and create your event
1. Go to Ticket Generator and sign up for free. Note that you will not be asked to enter any card details while signing up. And once you sign-up, you'll get the first ten tickets for free
2. Now, click on Create New Event option. Add event-related information such as event name, date, description, venue, and time. Once you're done, click on Create.
3. After you do this, your event will be created.
Step 2: Upload your guest list
Once your event is created, click on the newly created event from the Manage Events tab. Look for the Guest Tickets section and click on it.
4. Then, click on the New Ticket(s) drop-down button and select the Bulk Tickets option to generate tickets in bulk or select Single Ticket if you wish to generate a single entry pass. Use this option to bulk generate and distribute entry passes in batches. You will have two different options for generating and distributing your entry passes.
Step 3: Add a design to passes
5. Next, you'll be able to add design to your tickets. And there are three different ways to do it
The first is by clicking on the Upload Own Design option. It helps you use your own template to design the passes. Using it, you can superimpose the unique ID and QR Code on the passes.
It even allows you to add variable information by clicking on the ?+? button.
The second is via the Edit Design option. It allows you to use the standard design to design passes from the scratch. Using it, you can add your logo, theme colors, or a background image to the pass.
The third is Select from template, here you will see a number of pre designed templates to choose from.
6. After you've designed the ticket, you can click on Preview to see how it looks
Step 4: Choose automatic ticket delivery system
7. After finalizing the design, click on Done. Next, you will be able to choose the delivery method via one of the following three methods:
i. Generate form link: Using this option, you'll be able to create a landing page to get registrations. And as discussed above, after creating the form, you can share the link with your audience. They'll then receive the tickets by email on registration approval
ii. Generate and Download: It allows you to create and download the tickets as printable PDFs
iii. Generate and Send: It'll help you share the tickets via email, phone, or both of them
iv. Generate via API: USing this alternative, you will be able to create the tickets in real-time via your own information system programmatically
8. After specifying the delivery method, you'll be abo download the tickets or send them to the guests
It's that simple! Now all your guests need to do is get their tickets scanned at entry and that validation can be done using just your phone.
Ticket Generator runs on a low-cost, commission-free ticketing model, so you keep 100% of your ticket revenue. It also supports reserved seating plans, bulk ticket generation, QR-based secure check-ins, and automated email delivery, all without hidden platform fees.
Set Up Event Ticketing and Distribution in Minutes!
First 10 tickets free | Free account | No credit card required
You can even appoint your team members as coordinators to validate the passes quickly. Here's how:
1. From your Ticket Generator account, go to the Manage Event section
2. Select the event to wish to validate the tickets for. Here, you need to click on More
Note that on the same page, you'll also see the option called Attendance Analytics
3. After clicking on More, click Add/Edit Coordinator
4. Next, you can add the email address of desired people you want to add as coordinators. They'll then receive the required invitation
5. Then, they'll have to install the Ticket Validator app to validate the passes via App Store or Play Store
6. After downloading and logging into the app, they can select the event. And then they need to click on Scan QR Code to get started
That's it. If you're still reading, you know everything about entry pass maker. You can now go ahead and get started with it.
In addition, there might be instances where you'd want to create single tickets. Here's how you can do it:
F. What to do in case of last minute emergency?
In case some people walk down the venue at the last minute and you want to give them the passes too, here's how you'll be able to do it:
a. Login to your Ticket Generator account
b. From the dashboard, click on the event for which you want to create these tickets.
c. Now, click on Guest Tickets tab.
d. Here, click on New Ticket(s) drop-down and select the Single Ticket option select the delivery method Download Ticketand Send Ticket as per your choice
e. Once selected, click Generate & Download (in case of Download Ticket) or click Generate & Send(in case of Send Ticket)
That's it. A new single ticket will be generated.
Using the same Guest Tickets tab, you'll also be able to find and resend the tickets to guests. This comes in handy if any guest didn't receive the pass the first time.
G. Best practices for secure & fast event entry
Here’s what I’ve learned after managing different types of events.
1. Always use unique codes: Every pass should have a unique QR code or barcode. This stops duplicates instantly.
2. Avoid static PDFs for paid events: If someone can copy and forward it, they will. Use a digital entry pass maker with scan validation instead.
3. Keep check-in simple: Your staff should be able to scan using a phone. No heavy hardware. No complex setup.
4. Separate entry types clearly: Use different designs or labels for VIP, Staff, and General passes. It reduces gate confusion.
5. Track live attendance: Real-time check-in data helps you monitor crowd flow and capacity limits.
For events where security matters, I prefer QR-based passes with validation and tracking. It removes guesswork at the gate and prevents fraud before it happens. If you're handling paid entry, tiered access, or larger audiences, a secure digital ticket system makes a big difference.
H. Use cases: Which entry pass maker works for your event type?
Here’s how I usually decide what kind of entry pass maker to use:
Event Type
Recommended Solution
Why
School events
Printable entry passes or basic QR passes
Simple access control. Low risk.
Corporate seminars
Digital entry pass maker with QR validation
Faster check-in and attendance tracking.
Concerts / Paid events
QR-based secure tickets
Prevents duplicates and fake entries.
Charity events
Digital passes with email delivery
Easy distribution and better crowd control.
Exhibitions / Trade shows
QR passes with scan analytics
Track visitor flow and peak hours.
VIP events
Unique QR passes + access levels
Control restricted areas smoothly.
Reserved seating events
Entry pass maker with seating plan feature
Avoids confusion and seat disputes.
Final thoughts: Choosing the right rntry pass maker
At the end of the day, the right entry pass maker depends on your event.
If it’s small and simple, printable passes work. If it involves payments, large crowds, or security, you need more control.
From what I’ve seen, most entry issues happen at the gate. Duplicate copies, long lines, confused staff. That’s where digital passes with QR validation make a real difference.
If you want something that handles:
Commission-free ticketing
QR-based secure entry
Reserved seating plans
Bulk pass generation
Automated email delivery
… then it makes sense to use a tool built specifically for events.
Ticket Generator keeps things simple. Low cost. No hidden fees. And you stay in control of your ticket revenue.
If you’re planning an event soon, try creating a few passes and see how it feels. Once you see live check-in tracking and automated delivery in action, it’s hard to go back to manual methods.
Start small. Test it. Scale when you’re ready.
Set Up Event Ticketing and Distribution in Minutes!
First 10 tickets free | Free account | No credit card required
An entry pass maker is a tool that helps you design and generate passes for events, schools, offices, or private gatherings. It can create printable passes or digital passes with QR codes for secure check-in.
2. Can I create an entry pass for free?
Yes. You can use Word, Canva, or free templates to create printable entry passes. For more advanced needs, some platforms offer free entry pass maker tools with limited features.
3. What is the difference between printable and digital entry passes?
Printable entry passes are manually checked at the gate. Digital entry passes use QR codes or barcodes for scanning. A digital entry pass maker prevents duplicates and speeds up entry.
4. How do I prevent fake or duplicate entry passes?
Use unique QR codes or barcodes for each pass. A digital entry pass maker with scan validation ensures each pass can only be used once.
5. Can I create entry passes with reserved seating?
Yes. Some entry pass maker platforms allow you to assign seat numbers and manage seating plans. This helps avoid confusion at the venue.
6. What is the best entry pass maker for paid events?
For paid events, choose a digital entry pass maker with QR validation, automated email delivery, and secure ticket controls. This ensures smooth check-in and prevents fraud.
Yashika Tangri is an amazing marketing manager who operates from Trycon Technology's Noida office. Her name signifies success and fame, and she has certainly lived up to these expectations.
At work, Yashika is a highly efficient digital marketing organizer and a source of inspiration to her colleagues with her positive demeanor and professional work ethics. Despite being a lifelong student of science, Yashika decided to pursue a career in marketing in 2018.
After work hours, Yashika enjoys creating new playlists on Spotify, and she is an avid reader who finds solace in escaping reality through the pages of mythology books




.png)

.png)



.webp)

.svg)
.svg)